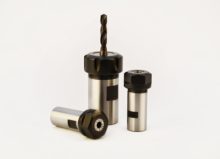
How To Install a Collet Chuck on a Lathe
Using a collet chuck on a lathe allows the machine to hold a part or stock more securely. TM Smith offers high-quality collet chucks for lathes and other tools. With this information, you can use collets on your lathes securely and safely.
Swapping a Lathe Collet Chuck
Typically, when installing a collet chuck on a lathe, you first need to remove the existing chuck. Swapping from one to the other is a relatively simple process. However, you must be careful to line up the collet chuck parts correctly. A crooked part can become very dangerous when the machine is operating at speed. The replacement chuck must also be the right size and shape to ensure a secure fit with complete contact on the secured part.
Below are the general steps for removing a standard chuck from a lathe and installing a collet chuck in its place. Naturally, the steps may be slightly different if a different type of chuck is currently in use. Nonetheless, most chucks can be removed with relative ease. Make sure to check the lathe’s documentation for specific instructions. While the general steps should be the same, it is important to follow manufacturer guidance to ensure safety and to protect your tools from damage.
Steps To Remove a Chuck
For a standard lathe, follow these three simple steps to remove the existing chuck:
- Get the Key: Grab the chuck key, which is usually mounted somewhere on the side of the lathe. Some machines have different positioning. However, they usually have a dedicated spot for the key for convenience. Be sure to put the key back when you are done.
- Loosen the Cam Locks: While supporting the chuck, turn each of the cam locks roughly a quarter-turn counterclockwise using the key. You should feel the chuck getting loose as you disengage the locks.
- Remove the Chuck: Carefully lift the chuck away from the spindle. Place it somewhere safe and stable.
The process should be very simple, especially if you have your shop well-organized. With the chuck removed, you are ready to move onto installing the new collet.
Steps To Install a Collet Chuck
The process of installing a collet is a little more complex, but still easy enough that anyone can do it. Again, the exact steps may vary slightly depending on the lathe.
- Clean Parts: First and foremost, make sure all the parts are clean. Good cleaning practices help to ensure the maximum service life of parts and improve lathe safety.
- Install Adapter: If needed, install the collet adapter. A light tap with a lead of polyurethane hammer can help to get it firmly into place.
- Slide Drawbar Into Place: From the back of the lathe, slide the drawbar into position. It should be pushed all the way in.
- Attach Clevis: Attach the clevis at the back of the machine. When ready, engage it.
- Position Collet Chuck: Place the collet on the lathe spindle. Tighten it with the draw nut.
- Adjust Closer Lock Ring: Finally, adjust the closer lock ring until the collet has closed on the part and the lever cams over to secure it. Engage the key on the closer lock ring.
With that, the collet chuck is installed on the machine. After clamping your part, turn on the lathe at a low speed to ensure that it is square.
Conclusion
Installing a collet chuck on your lathe can help to extend its usefulness in the shop. With the above steps, the process is fairly straightforward. However, caution should always be exercised when using any part or tool with a lathe to ensure proper installation in accordance with the manufacturer’s specifications.